Pelargoniums, often mistaken for geraniums, are vibrant and hardy plants that can transform any garden with their colorful blooms and aromatic greenery.
But did you know you can easily multiply your collection without splurging on new plants? Taking cuttings from pelargoniums is a simple, cost-effective way to grow more of your favorite varieties while rejuvenating old plants.
Whether you’re a beginner gardener or a seasoned plant enthusiast, this step-by-step guide will walk you through everything you need to know about propagating pelargoniums using cuttings.
What Is a Pelargonium Cutting?
A pelargonium cutting is exactly what it sounds like—a small segment of the plant that is cut and then grown into a new plant. Unlike seeds, cuttings allow you to create an exact clone of the parent plant, preserving its unique characteristics such as flower color and growth habits.
Using cuttings is a faster and more reliable propagation method compared to growing pelargoniums from seeds. It’s also incredibly rewarding as you get to witness new life sprouting from a stem you’ve nurtured.
When Is the Best Time to Take Pelargonium Cuttings?
Pelargoniums are incredibly adaptable and can be propagated year-round, but for the best success, aim to take cuttings between late summer and early autumn. During this time, the plant is still actively growing, and environmental conditions like light and warmth are ideal for root development.
If you’re working in cooler months, using a heated propagator or grow lights can keep conditions optimal for rooting. These tools create a cozy environment for young cuttings to thrive, ensuring success even in less-than-ideal weather.
Why Should You Propagate Pelargoniums?
Before diving into the steps, it’s worth exploring why propagating pelargoniums is so beneficial:
- Cost Savings: Instead of purchasing new plants, you can grow them at home for free!
- Genetic Consistency: Cloning ensures the new plants will carry the exact traits of the parent, from bloom shape to fragrance.
- Winter Survival: Propagate plants as “insurance” to replace ones that might not survive harsh winters.
- Environmentally Friendly: Reducing demand for store-bought plants limits the ecological footprint of mass production.
How to Take Cuttings from Pelargoniums
Follow these detailed steps to ensure your pelargonium propagation is a success.
Step 1: Gather Your Tools
Before you start, prepare the following items to ensure a smooth process:
- Healthy pelargonium plant
- Sharp, clean pruning shears or a knife
- Small pots or seed trays with drainage holes
- Well-draining potting mix (a blend of compost, sand, and perlite works well)
- Rooting hormone (optional, but improves success rates)
- Transparent plastic bags or a propagator for humidity
Step 2: Choose the Right Stem
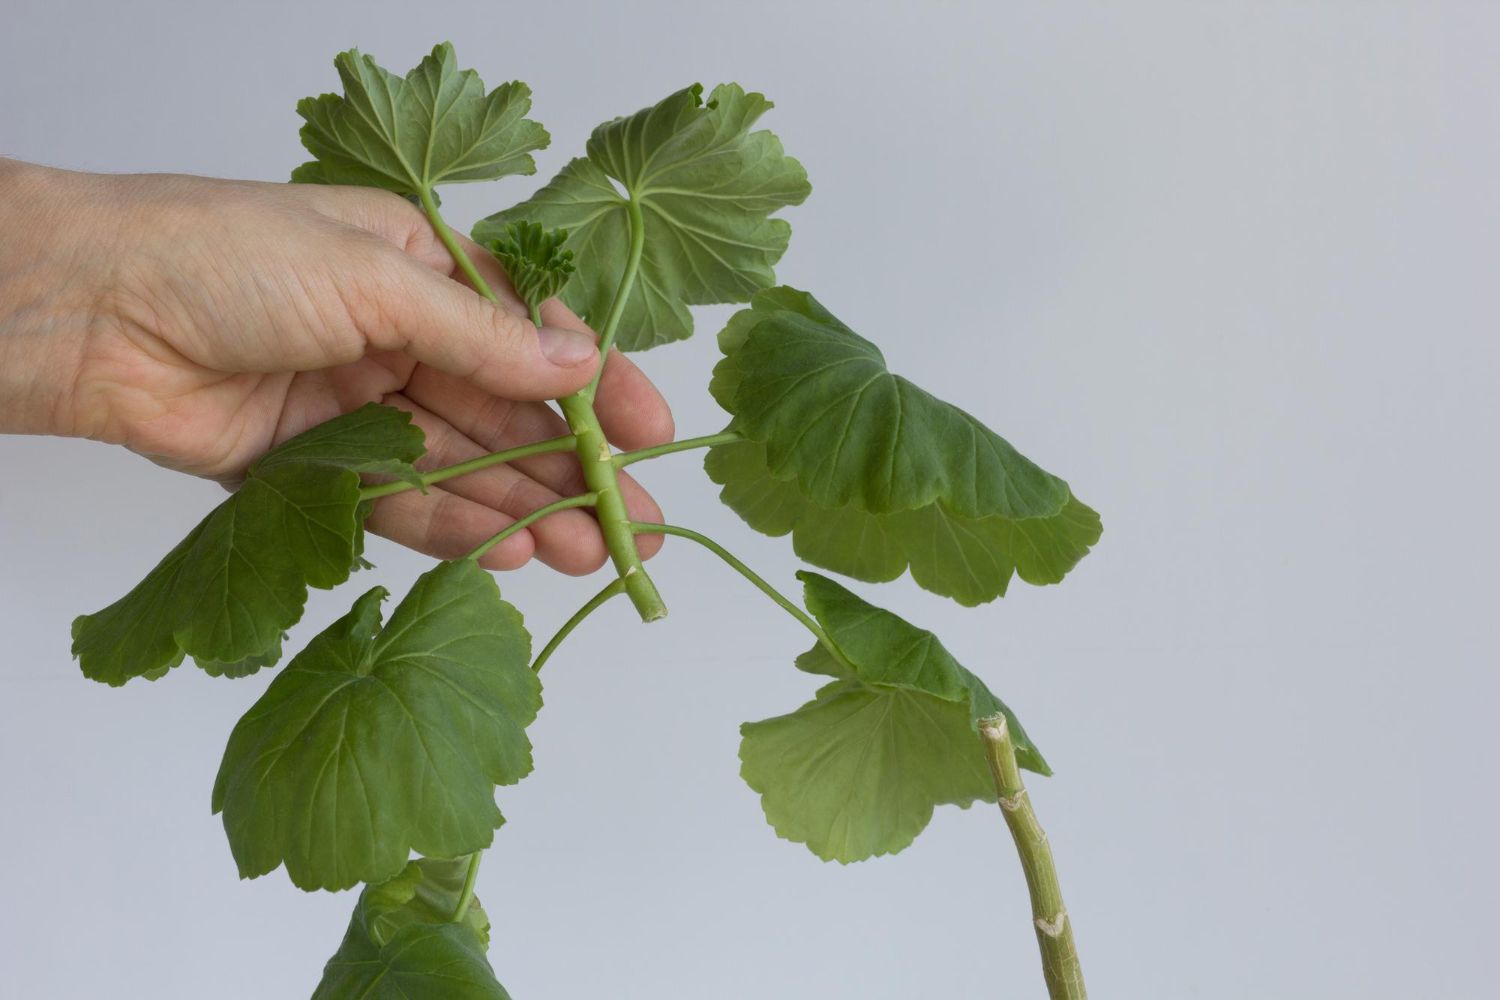
Select a healthy, non-flowering stem from your plant. Non-flowering stems root faster since they don’t need to expend energy supporting blooms. Aim for a cutting that is approximately 3-6 inches long.
Step 3: Prepare the Cutting
- Using sharp pruning shears, make a clean cut just below a leaf node (where the leaf meets the stem).
- Remove the lower leaves, leaving one or two at the top for photosynthesis.
- Allow the cutting to callus (dry out) for a few hours. This step prevents rot by sealing the wound.
Step 4: Prepare the Soil
Pelargoniums thrive in soil that’s light and well-draining. Mix compost, sand, and perlite to create the perfect medium. Fill your pots or trays with this soil, leaving enough space to accommodate multiple cuttings.
Step 5: Plant the Cuttings
Dip the callused end of your cutting into rooting hormone for an extra boost. Plant each cutting into the soil, ensuring the leaves stay above the surface. For stability, position the cuttings near the edge of the pot.
Step 6: Water and Cover
Lightly water the soil to settle it around the cutting but avoid soaking it. Cover the pots with a transparent plastic bag or place them in a propagator to maintain high humidity.
Pro Tip: Ensure the bag doesn’t touch the leaves—it can cause mildew. Use stakes or supports if necessary.
Step 7: Monitor the Cuttings
Place the pots in a bright location with indirect sunlight. Maintain a consistent temperature of around 70°F (21°C). Avoid overwatering—keep the soil moist but not waterlogged.
Step 8: Repotting
After 3-4 weeks, gently pull on a cutting to check for resistance. Resistance indicates that roots have developed. Once the roots are strong, transfer the cuttings to individual pots with fresh potting soil. Keep young plants indoors until the risk of frost has passed.
Common Mistakes to Avoid
Even with a simple process, some common errors can hinder your success. Here’s what to avoid:
- Overwatering: Too much water can lead to rot. Stick to light watering and monitor soil moisture.
- Skipping the Callus Step: Failing to dry the cutting can result in stem rot.
- Heavy Soil: Dense, water-retaining soil suffocates roots, so stick to well-draining mixes.
- Direct Sunlight: Never place fresh cuttings in direct sunlight—it’s too harsh for them to handle.
Tips for Successful Pelargonium Propagation
- Always clean your tools to prevent the spread of disease.
- Space cuttings out in pots—overcrowding leads to competition for resources.
- Be patient. Some cuttings may take longer to root, but persistence often pays off.
The Joy of Propagating Pelargoniums
Propagating pelargoniums isn’t just about multiplying plants—it’s about fostering a deeper connection with your garden. Watching a cutting transform into a vibrant, thriving plant is one of the most rewarding experiences for any gardener.
Now that you’re equipped with the knowledge, it’s time to pick up your shears and start propagating. Share your progress and success stories with our community on social media—tag us and inspire fellow green thumbs!
FAQs
Can pelargonium cuttings root in water?
Yes, but this method yields lower success rates compared to soil. Cuttings in water often develop weak, slimy roots that need extra care when transitioning to soil.
How long do cuttings take to root?
Most pelargonium cuttings root within 3-4 weeks when kept under optimal conditions.
Can you propagate pelargoniums directly in the garden?
It’s best to root them in pots first. Established cuttings move to the garden once they’ve developed strong roots.


